How To: Log In
This article describes the required steps for logging into the Ayuda PI API and using the returned sessionID in subsequent requests.
Postman
This article uses Postman to demonstrate API requests.
Requirements
You will need a valid username and password. If you do not have these credentials please contact your Ayuda representative.
Steps
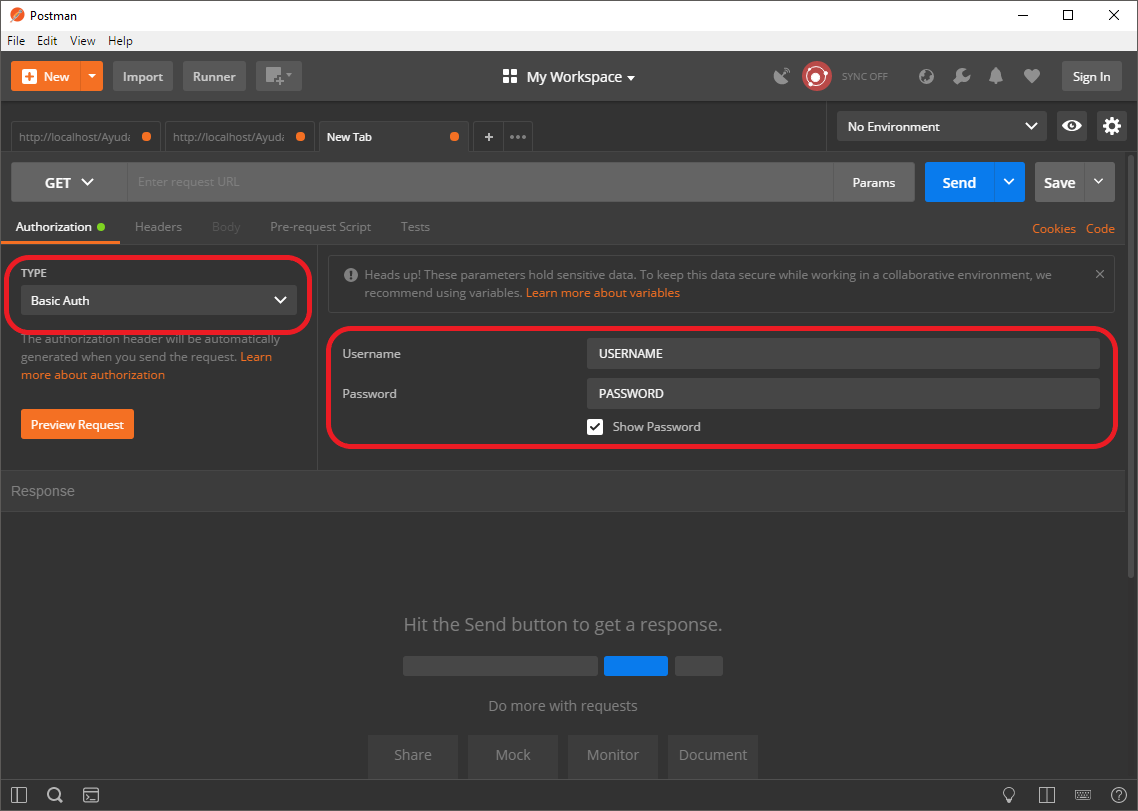
1. Add credentials to Postman
In the Authorization section of Postman, set the Type to Basic Auth and fill out the Username and Password fields.
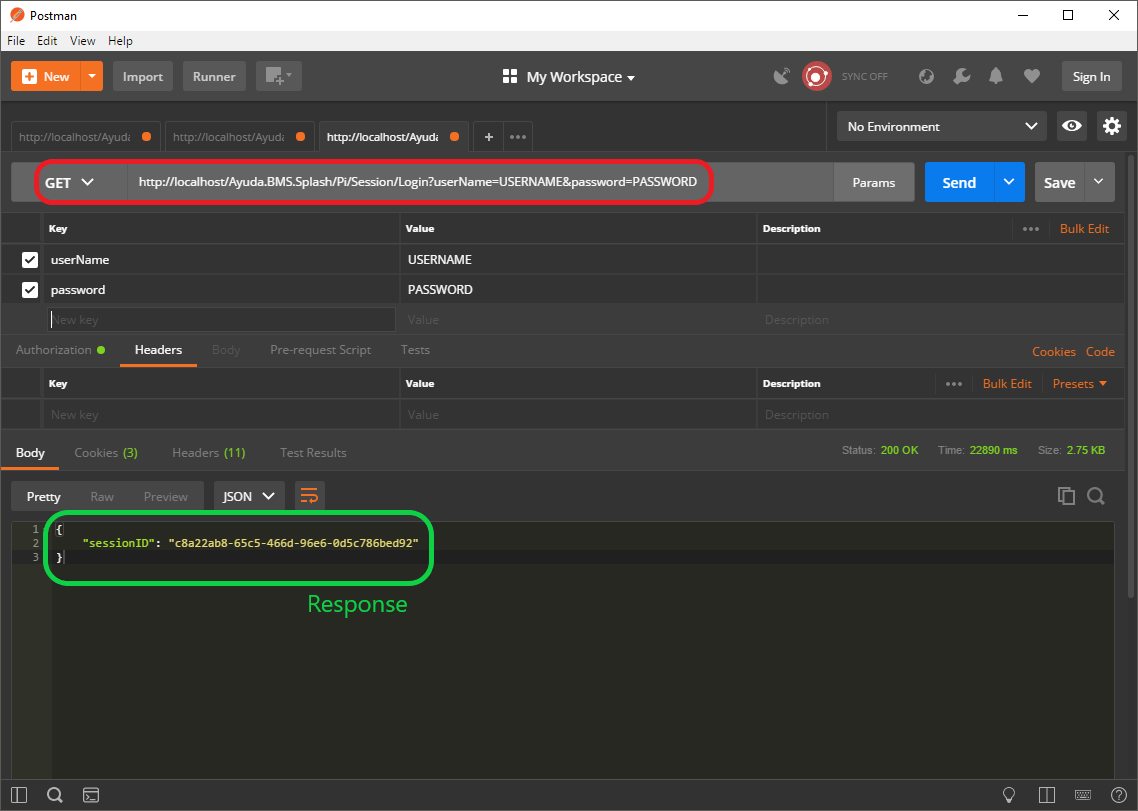
2. Log in
Send a request to /Ayuda.BMS.Splash/Pi/Session/Login
Two fields are required: userName and password. These can be included as
- URL parameters in a GET request, e.g.:
?userName=USERNAME&password=PASSWORD A JSON object in the body of a POST request, e.g.:
{
  "userName": "USERNAME",
  "password": "PASSWORD"
}
A successful response will contain a JSON object with a single field called sessionID. Record this value for use with future requests.
Note that in the image below the Params button has been used to expand the Parameters section, which Postman uses to make working with multiple URL parameters easy.
Warning
The userName and password field names are case sensitive. Be sure to capitalize userName as shown.
Note
The URL in the image below is pointing to localhost. Be sure to use the appropriate base URL for your instance.
Tip
If you get a 404 - Not Found error, try /Splash/Pi/Session/Login
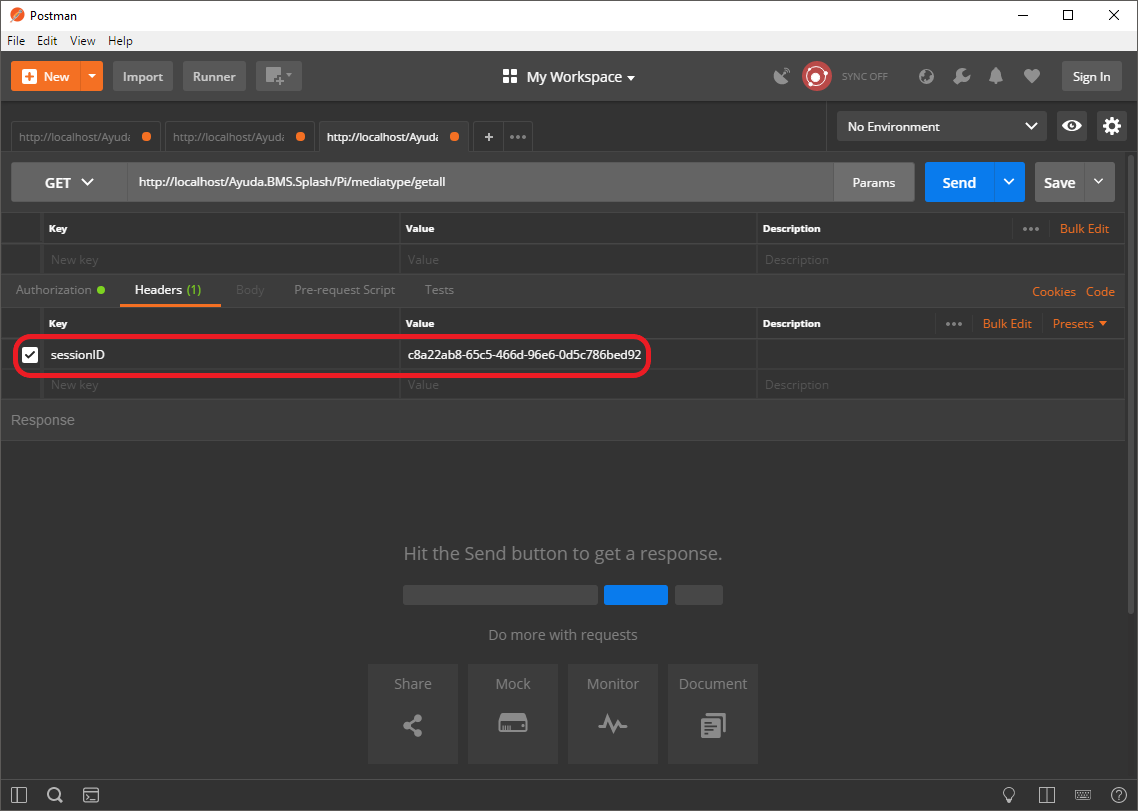
3. Add sessionID to request header
Subsequent API requests expect the sessionID to be present in the request header. With Postman this can be added as shown:
Warning
This header key is case sensitive. Be sure to capitalize sessionID as shown.